If you’ve ever been to magic show, you’ll be accustomed to seeing the magician perform fantastic tricks, but never sharing the secrets behind them to the audience, let alone to other magicians. Well the world of photography is not so different. Some of the best photographers may create a stunning image by combining camera techniques, light effects and postproduction, but very rarely would they tell you the secret behind the production of the image. Photographers can be rather jealous of their secrets and highly competitive… though there are some exceptions.
One of them is a photographer from Montreal, Canada, named Eric Paré. In the beginning of this year I came across a fantastic picture of his, showing a model with a circle of light behind her. It had been shot at night using a slow shutter speed. I was struck by the beauty of this magical image, but I couldn’t really tell the secret behind it. To my surprise, after a little research I stumbled upon the learning group Eric Paré had created on Facebook where he did more than just share every single secret behind this technique called Light Painting… After he accepted my request to join the group, I was also so pleased by the fact that he was more than willing to answer mine and other photographers’ questions about light painting.

So, determined to master this technique, one night I came to my boyfriend and showed him the Light Painting images by Eric Paré and said “We have to do this!” and explained to him all about the group and how it was done… Even though he’s not a photographer himself, you do need at least two people to do light painting. Half asleep after a long day’s work, and not too convinced about this whole light painting thing, he said yes just to please me. But deep inside he knew he was already signed up to another one of my crazy ideas… We had started on our Light Painting journey and a new obsession was born.
- Our 1st attempt. It was disastrous. We went out to a park in Söder on a very cold night in the beginning of March. I thought the fresh snow on the ground would create a nice effect. Truth is, nothing looked as I had imagined. At this point I didn’t understand why the result was so bad! We had the idea, we had some of the equipment needed but the skills… well those clearly needed some polishing.
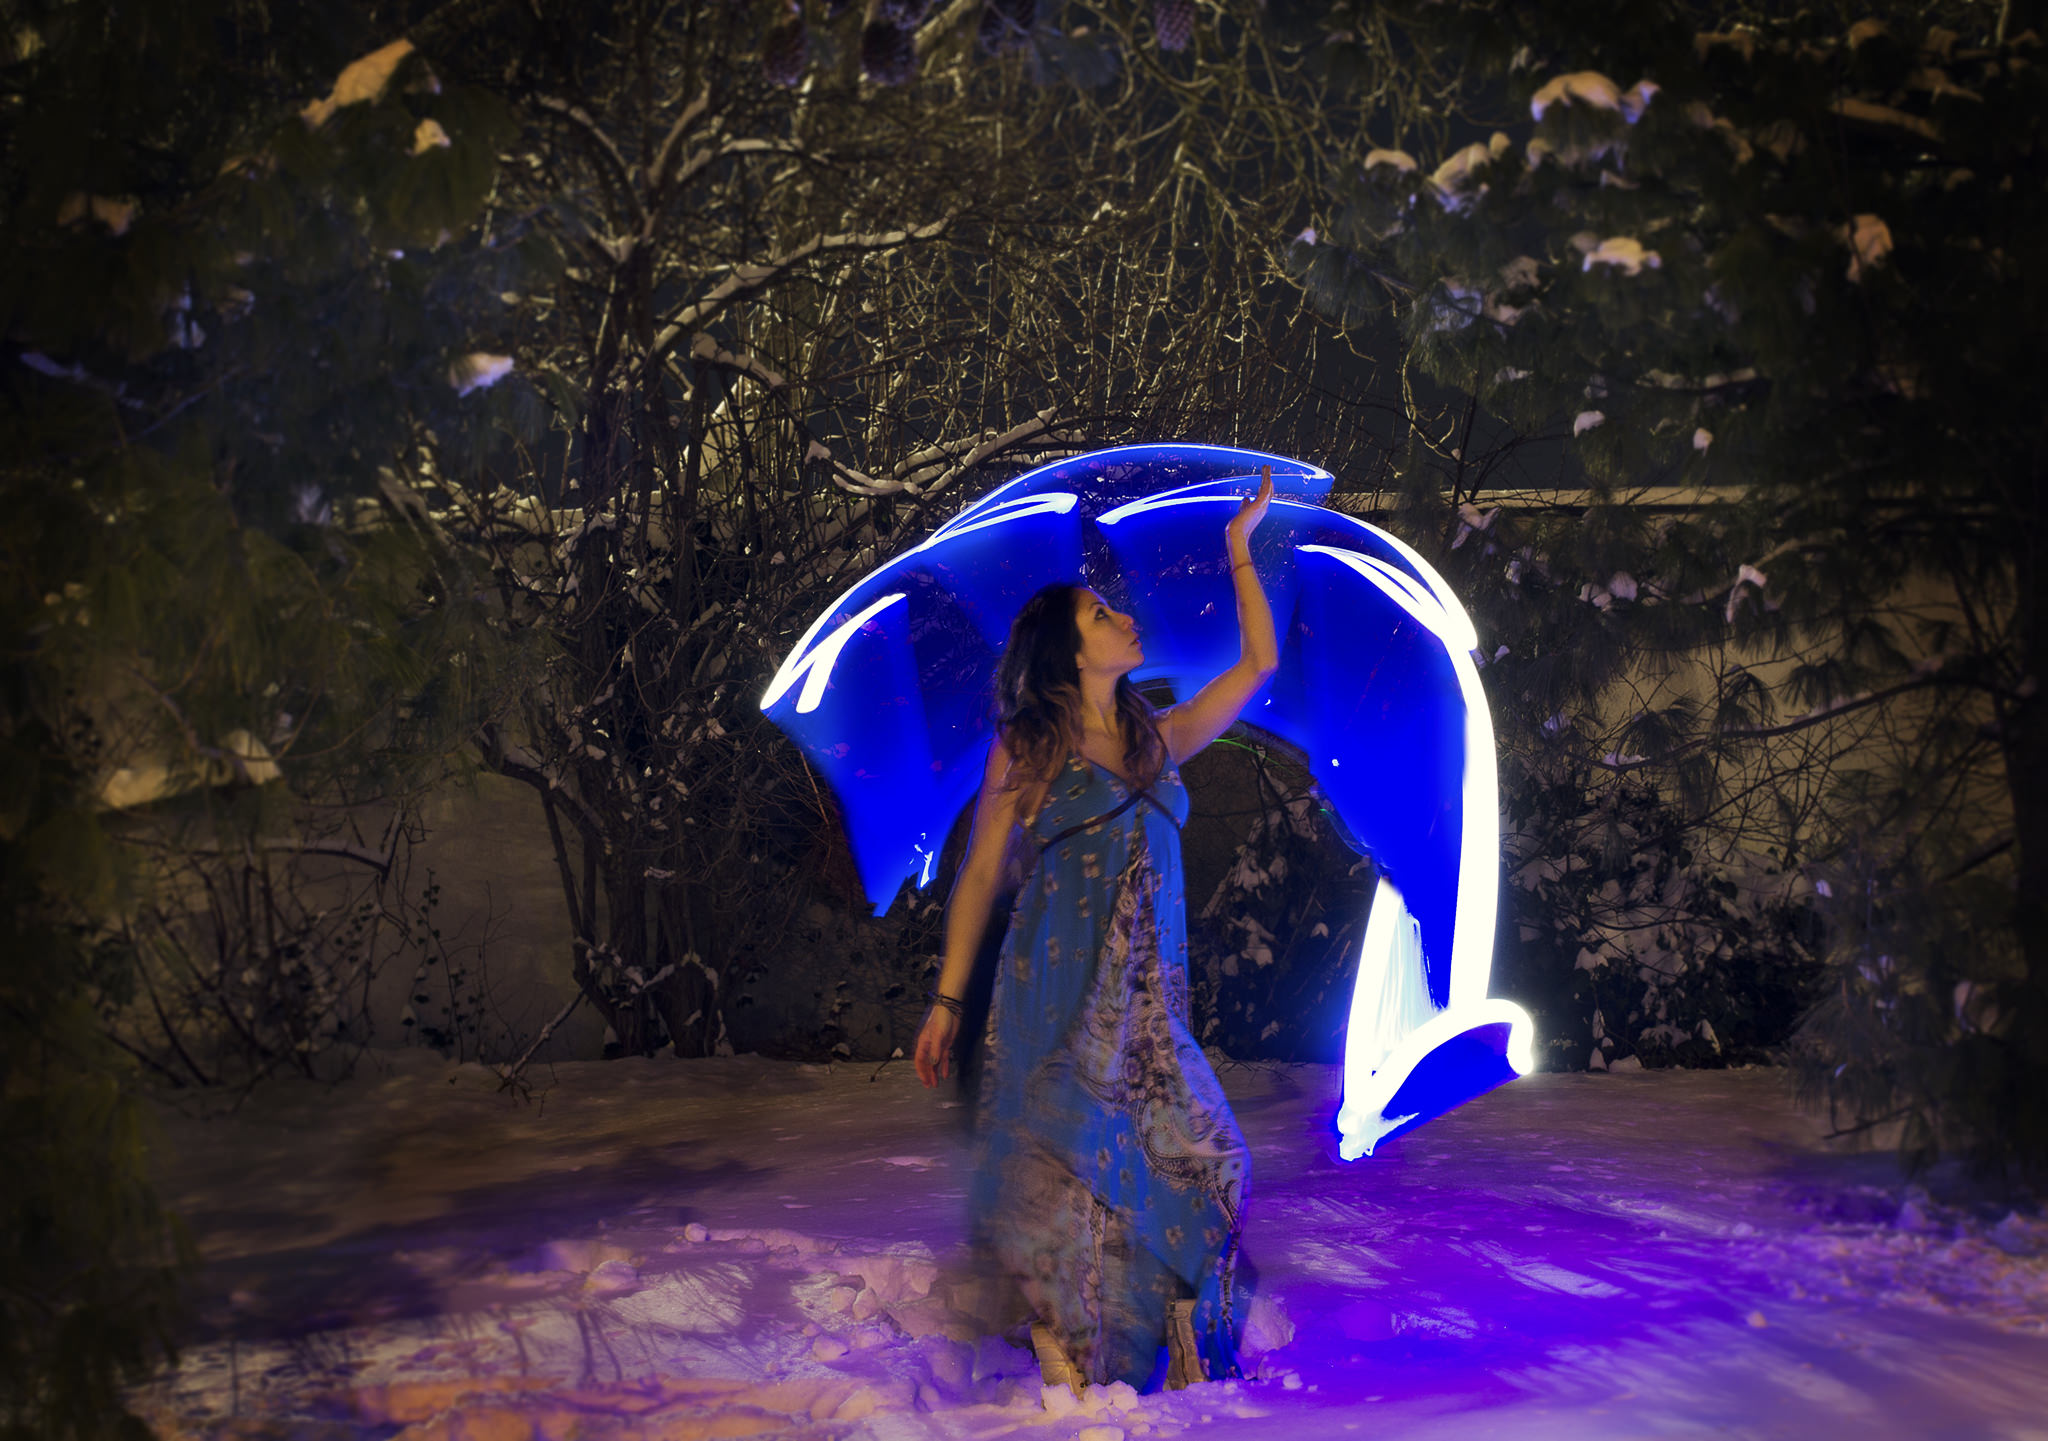
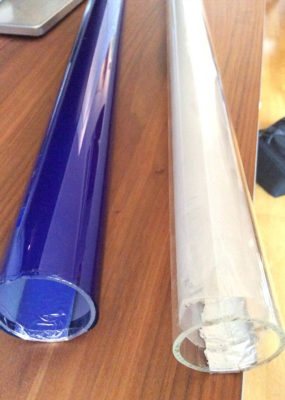
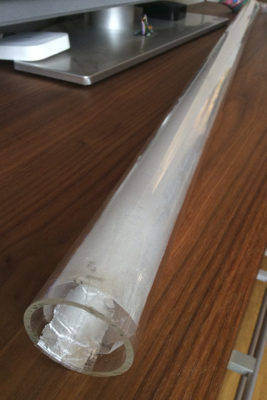
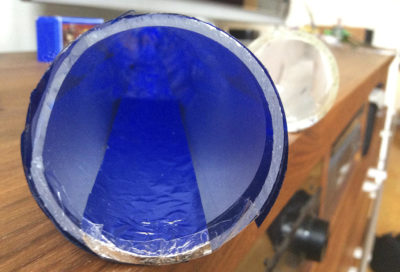
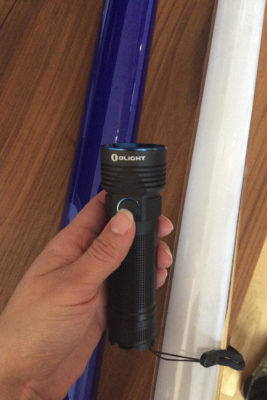
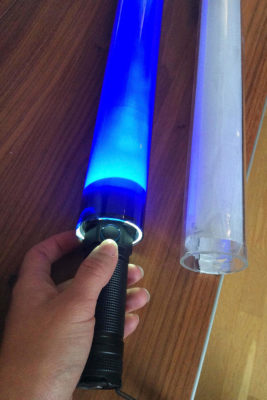
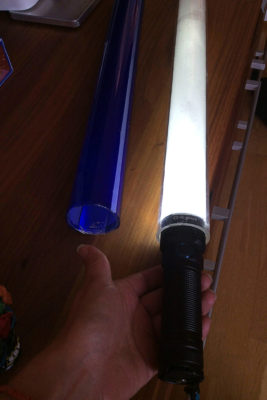
Now, before we continue, let’s get to the HOW this is done. First of all you need a camera which you can use in manual mode, where you can set up the ISO, the aperture and the shutter speed values. You need a sturdy tripod that can keep the camera steady and won’t get shaken by the wind. Preferably you would want to have a remote camera trigger. Now, to create the light painting shapes you need a transparent tube guard, which is basically a plastic tube. I bought mine at the store Material in Folkungagatan, though the acrylic tube I bought there is very heavy, but this was what we had to make do with. Then you need a flashlight with a strength that reaches up to 1000-2000 lumens, I bought mine on eBay. You are going to use the flashlight and the plastic tube together, by inserting the flashlight in one end of the tube. The plastic tube should preferably be prepared with a diffusing layer of paper also called parchment paper. This can be the white baking paper as well, but you can also sand the outside of the tube for the same diffusing effect. You may also want to add a tin foil strip inside the tube which will make some of the light emitted by the flash light bounce. This will aso create a back and a front side to the tube, the back the side being the one that has the tin foil strip. On the opposite end of the tube, against the side where you will have your flashlight, you should add a white cap or a cap with tin foil for further light reflection. You can also add colour to the tubes and create coloured shapes if you put in some of what is called gel, which is basically a thin semi-transparent plastic film, outside or inside the tube – after you have put in the diffusing layer.
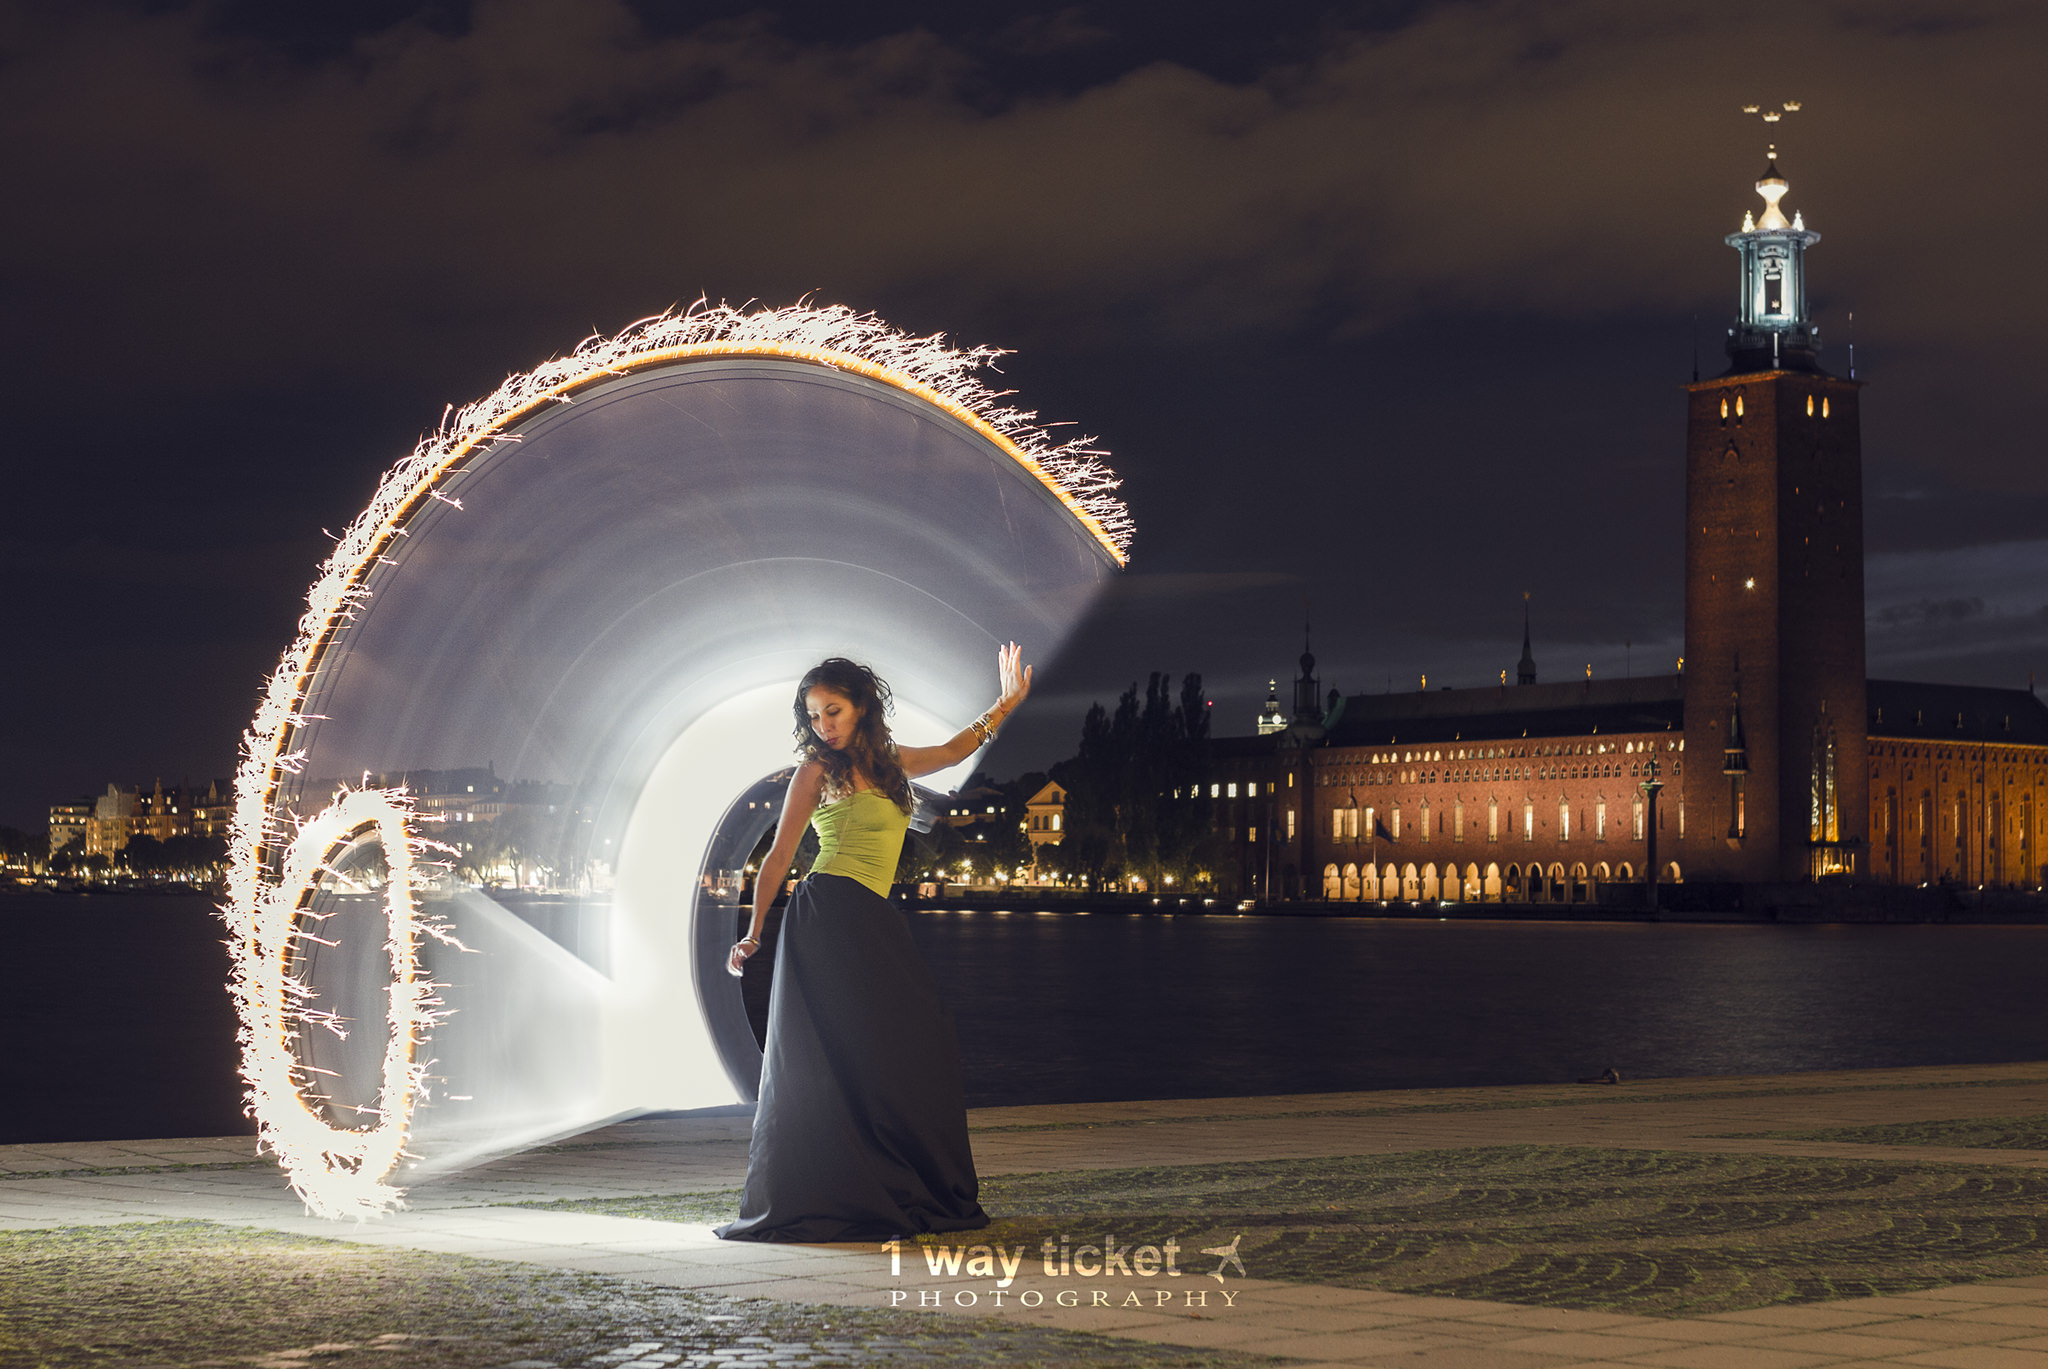
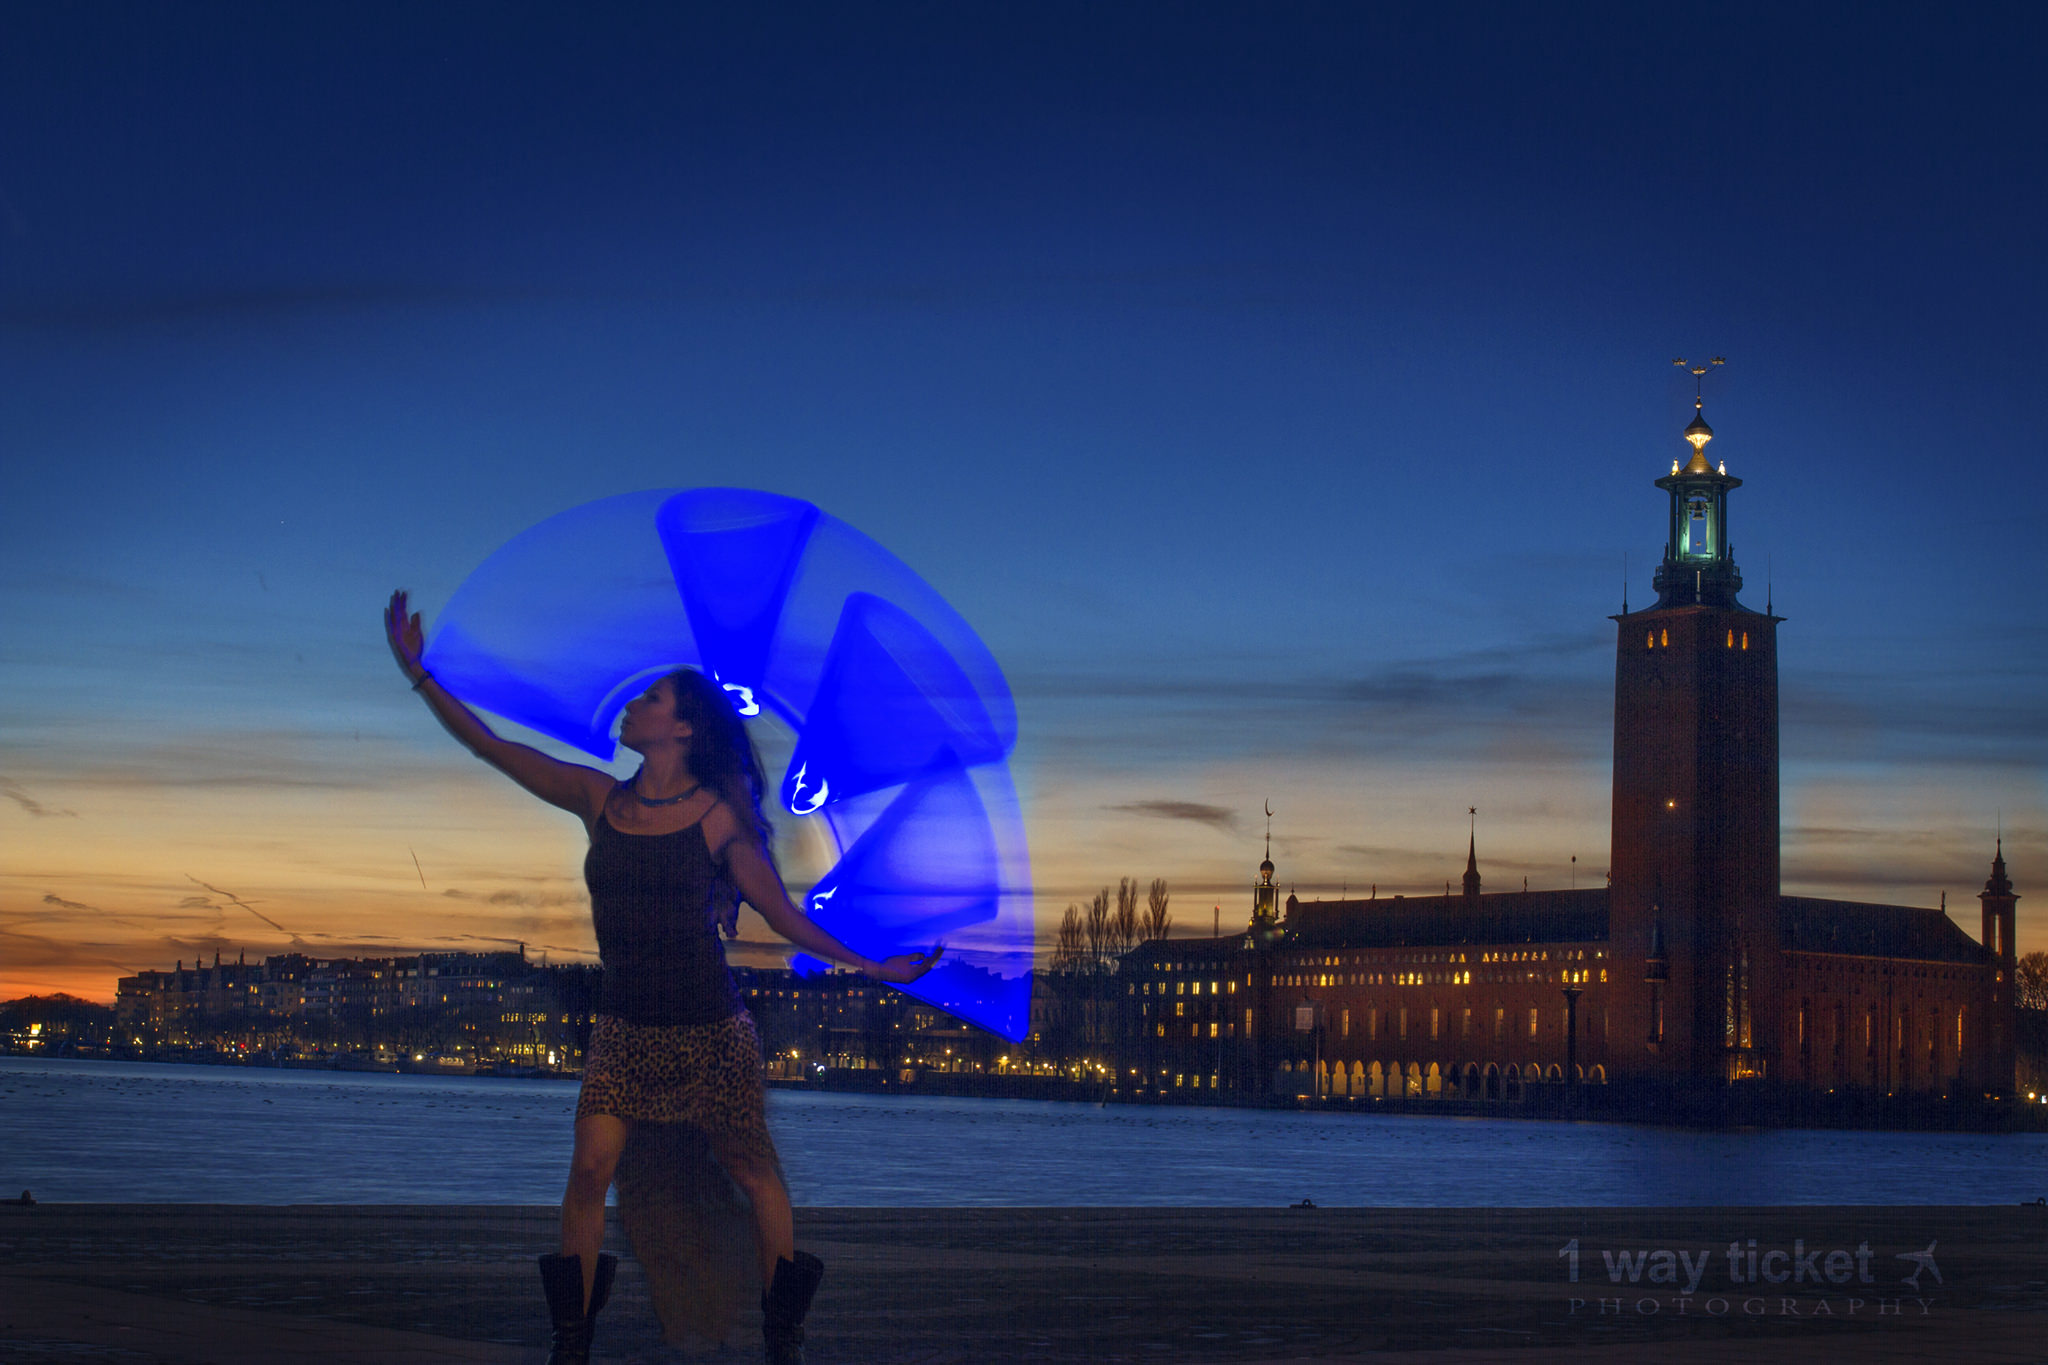
- Our 2nd attempt. By April me and my (forced) team member were already hooked with this technique despite the failure of our first attempt. There is something about shooting in a slow shutter speed, running back and forth from and to the camera and seeing the resulting light shapes that is actually pretty fun. We took our light painting attempts to the Evert Taube terrace in Riddarholmen, thinking that the view towards City Hall/Stadshuset would make a great back drop to our pictures. The problem wasn’t actually the beautiful landscape behind us, it was again us who didn’t create the effects we had expected. Though moving forward from the first attempt, it showed a slight improvement, but it was still pretty unsatisfactory. The problem this time, the flash light and my camera settings.
Another important thing that one has to master is to balance the camera settings with the available light around you and the light the flash light will be emitting. You may choose to photograph during the “blue hour” which is that moment after the sun has gone down the horizon and the whole sky shows that beautiful gradation from light blue to dark navy. This is a great moment to photograph as the available light will light up the model you choose to have posing in front of the light shape you will produce. For these conditions you might want to use a low ISO, something in the area of 100-250, an aperture level of between f5-f8 or higher and a shutter speed of between 1-2 seconds. Whilst your flash light can be at a high intensity to match the high lighted conditions around. But for a dark night, you might want to crack up your ISO, go down in the aperture to f3.5 or less, for example, and have a shutter speed that gives you sufficient time to create the light painting shape you desire, plus considering having a low intensity in your flashlight so that it doesn’t get overcome by the surrounding light.
- Our 3rd attempt. After realising that our gear bag was lacking a remote trigger – being model and photographer at the same time wasn’t easy without one. We also got a better flash light with higher intensity. In July we went over to Gotland and carried our light painting equipment with us to bring this technique to another level of efforts and landscapes. And we produced our first decent photographs, they were so good in comparison with our first attempts that we couldn’t even believe it ourselves.
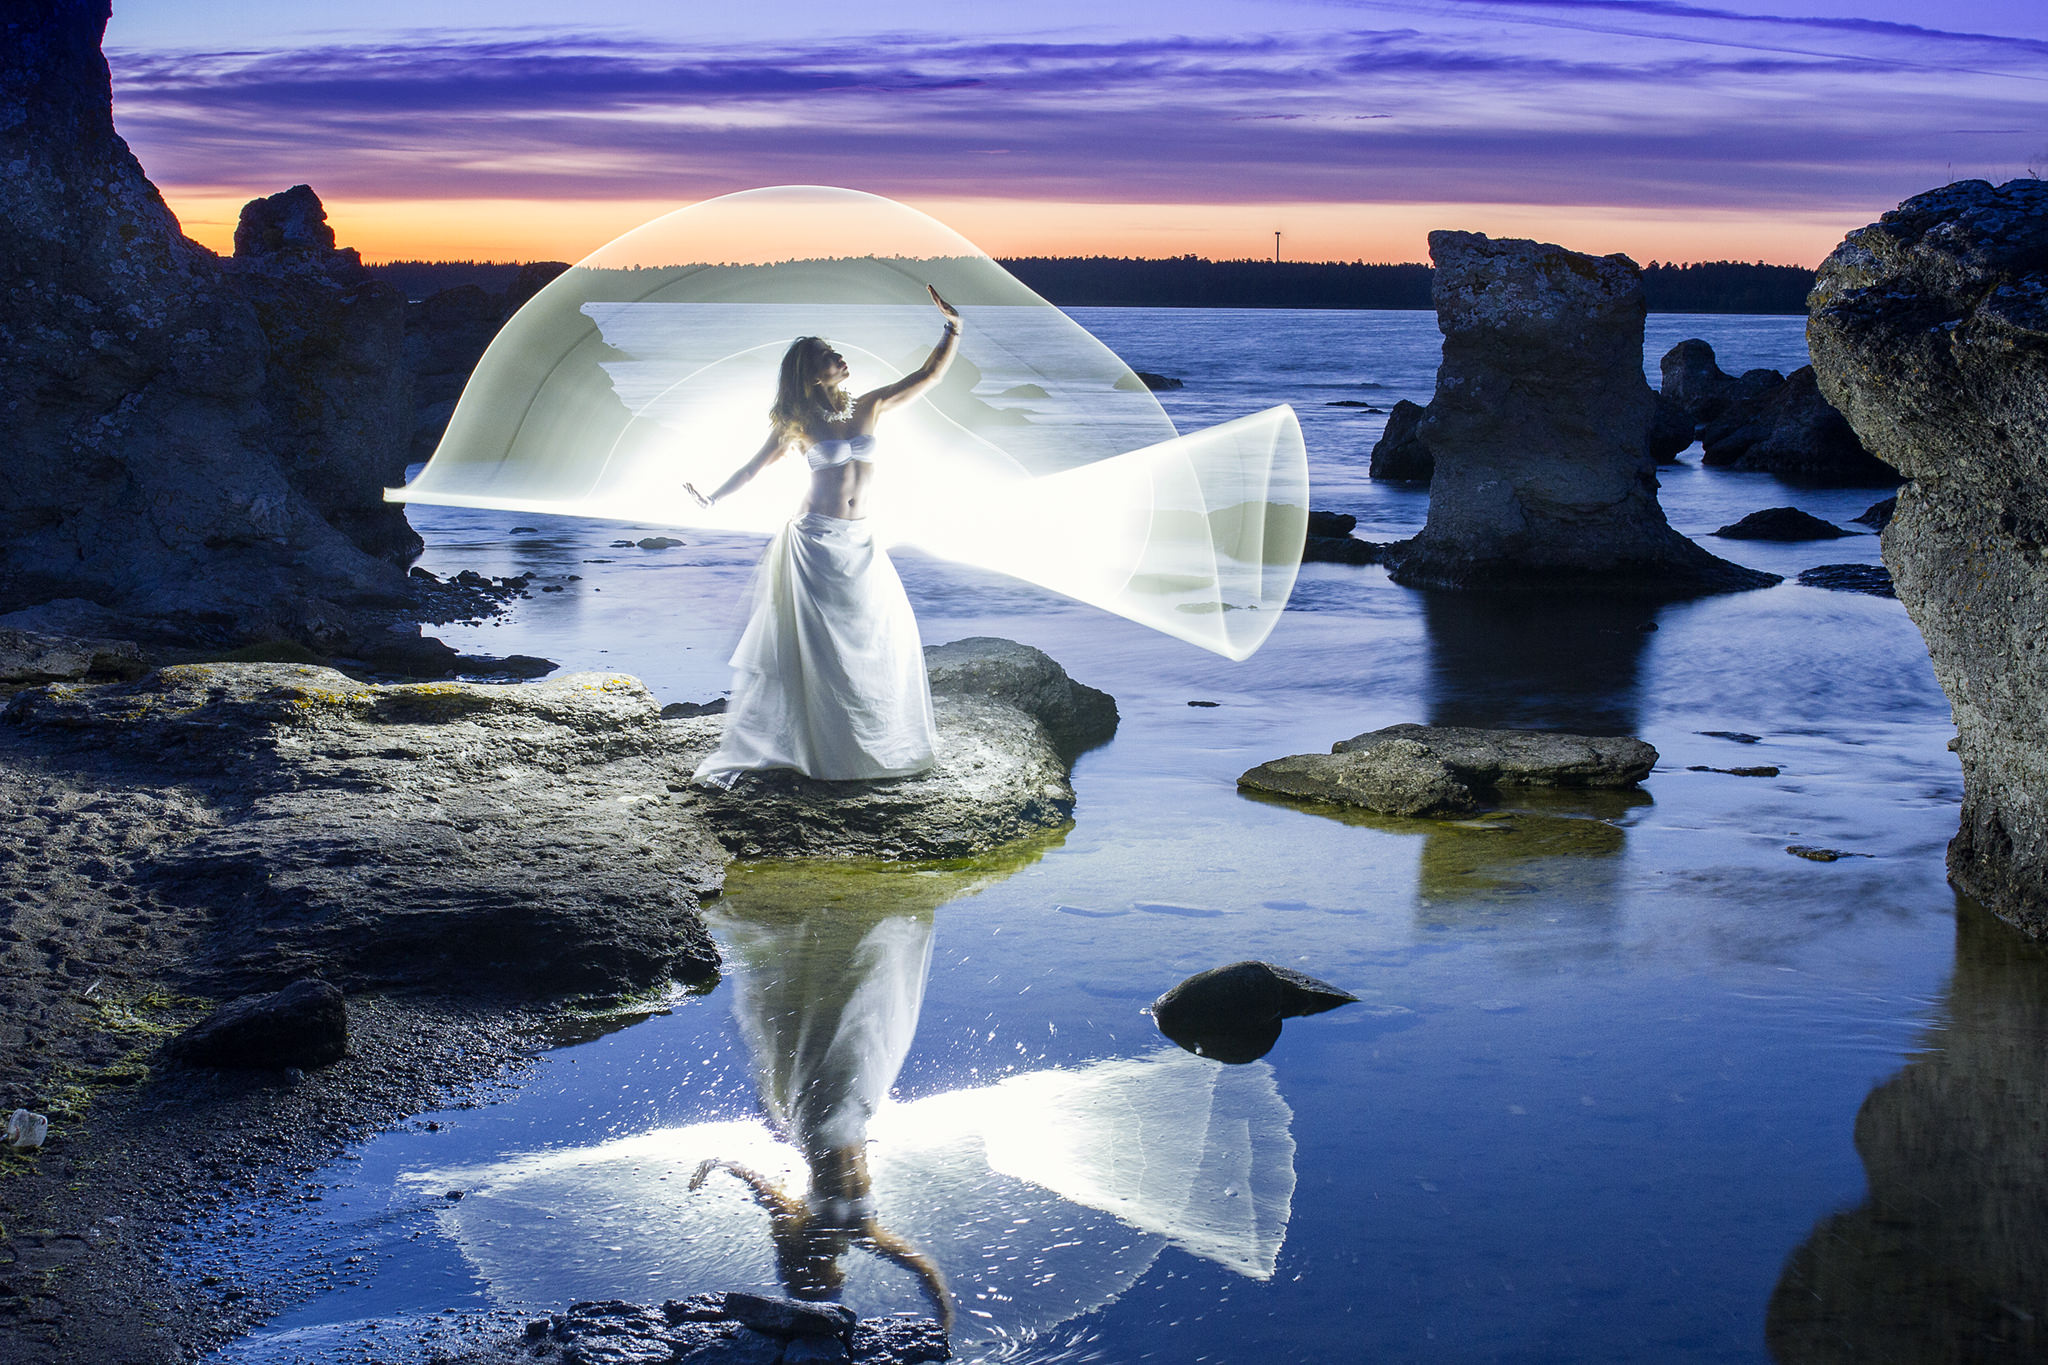
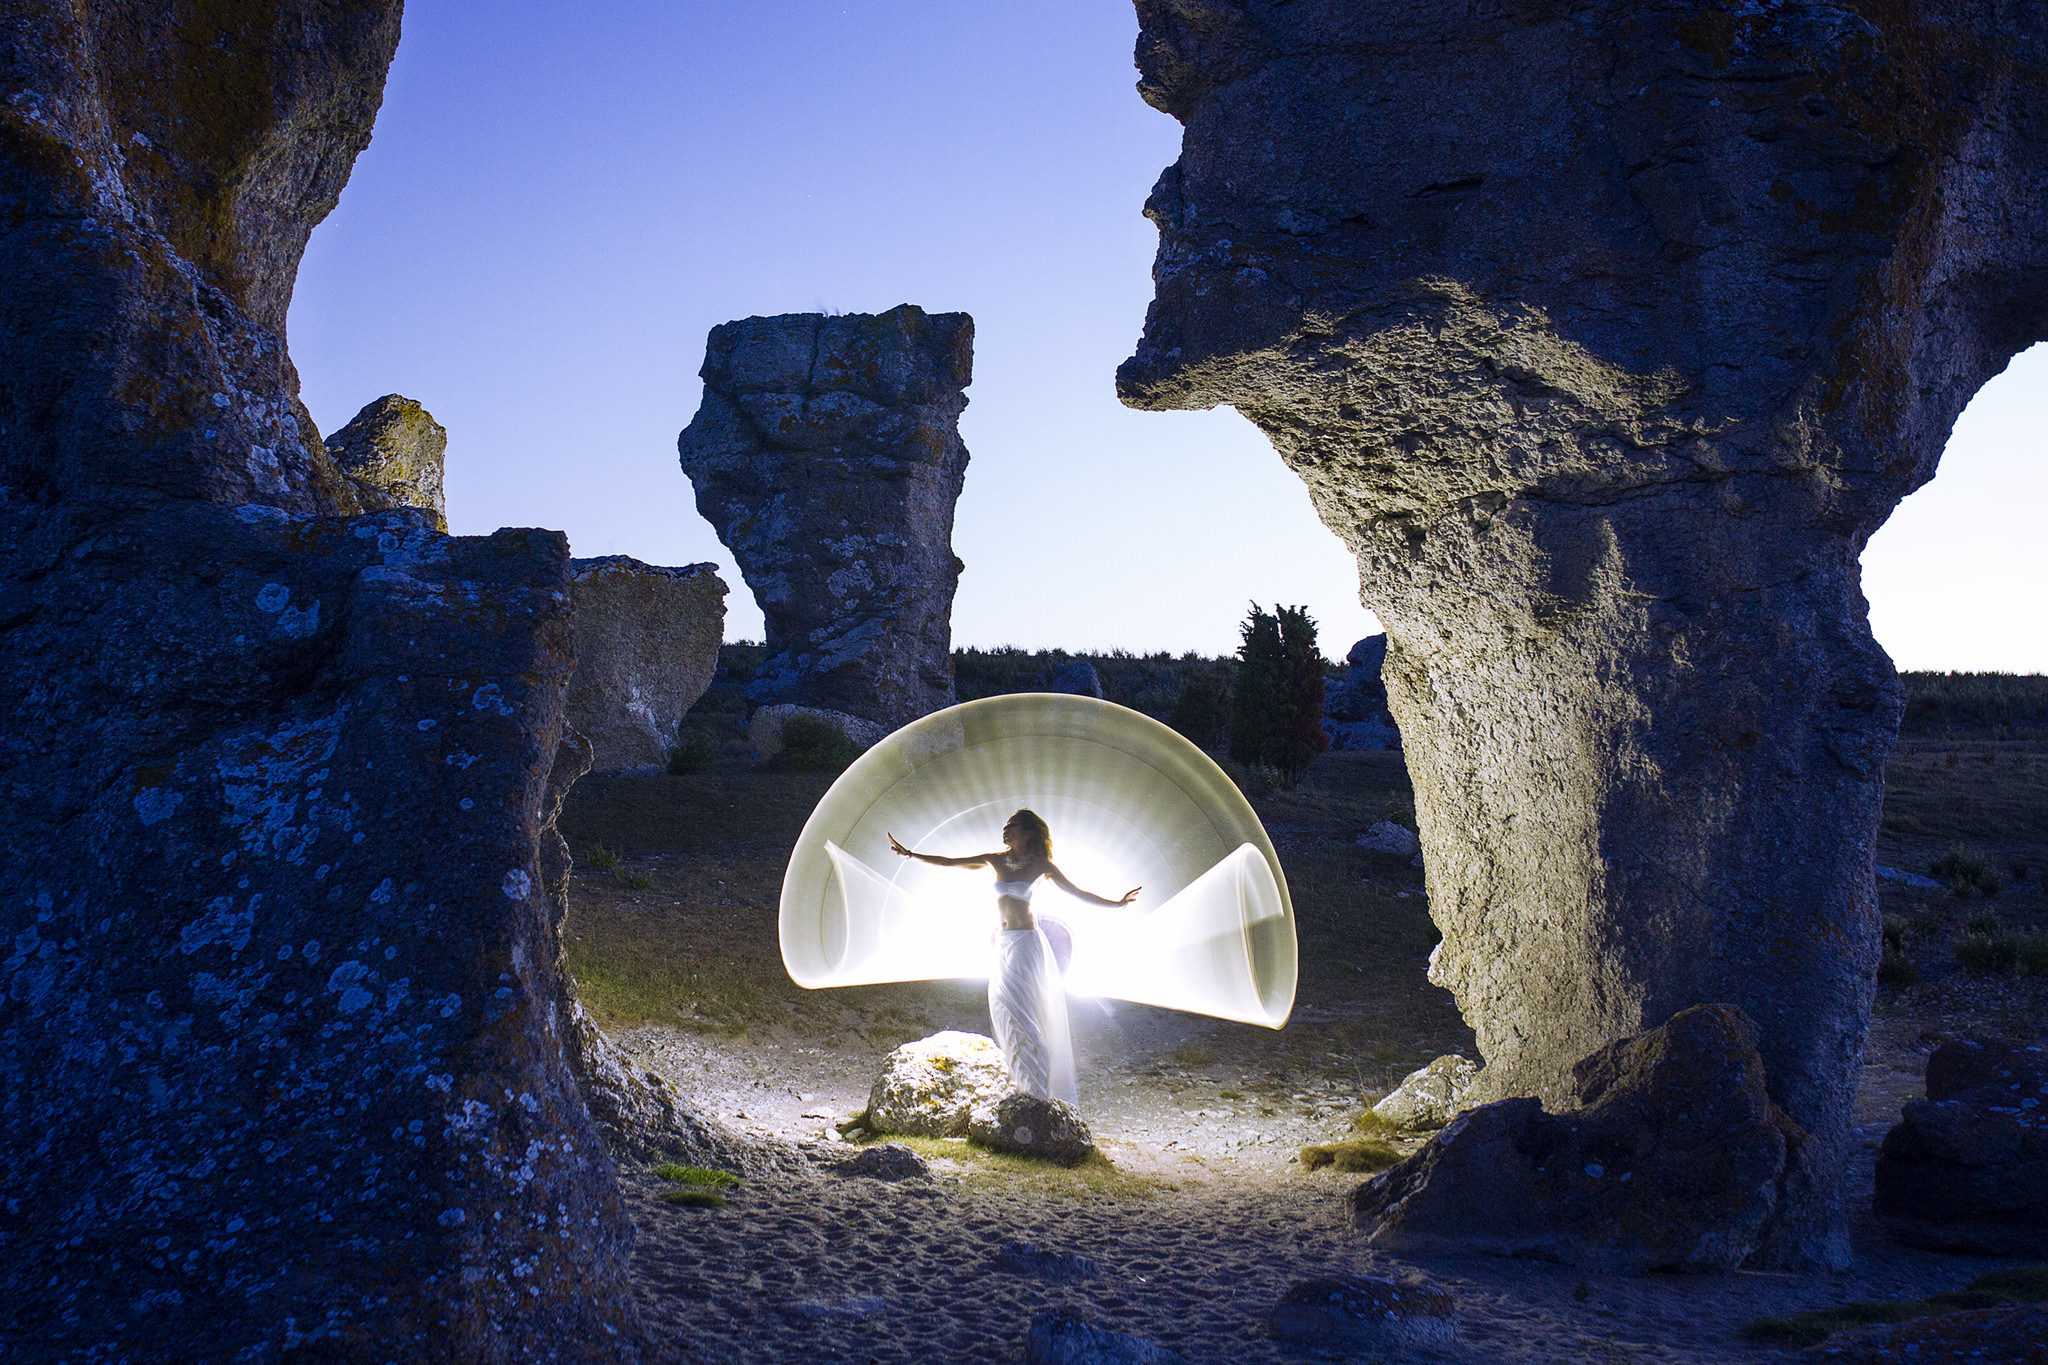
Creating the right shapes is also important, the light painter is the person holding the tube with the flash light in it, he or she will be standing behind the model, hiding his feet and body behind the model, that’s why the model would preferably use a long skirt. The light painter needs to sync his or her movements and start moving at the moment the camera’s shutter opens up and stops at the time it closes, whether this is 1 second or 5 seconds. Ideally the person performing the light painting shapes will trigger the camera with the remote trigger and wave the tube in a circle, semi-circle or whatever other desired movement, the camera will capture the trail of light left by the lit tube.
- Our 4th attempt. During the same visit to Gotland we spent a night at Stora Karlsö, a place so unique and with such magic in the air as if it was taken out of a film, like Jurassic Park or something. We only spent one night there, but we used it wisely by practicing our seemingly mastered light painting technique. The results weren’t bad, but the photos were not as sharp. The night was so windy that it made me loose balance several times and made it practically impossible to strike a still pose during shots. At this point our remote trigger didn’t work as we were shooting with more than 5 meters distance from the camera. So I had to do a lot of running to trigger the camera and look at what was happening, then going back to posing in front of the camera.

From this session we learnt that practicing with not so long times such as a shutter speed of 2-3 seconds is actually the ideal, especially with strong winds, as there can be a lot of movement and hassle for both the light painter and the model to perform. Oh and yes, a remote trigger is key in making the most of your session, to take more pictures and allow yourself to get in the zone of it all without having to pause after every shot to run to the camera in order to trigger another shot.
- Our 5th attempt. This was perhaps the most pleasant session we’ve ever done. Previous sessions had taken place in chilly Sweden, whilst for this try-out we took our light painting gear beyond Swedish borders to the warm weather of the south of France for a session at the beach. That night was so nice and warm, so I didn’t freeze at all and could have gone on shooting all night long. We also had the help of my boyfriend’s nephew, who stood behind the camera and triggered every photo. All these factors together made the right conditions for a very relaxed session, resulting in very sharp photographs. As I wasn’t running from and to the camera anymore, it was quite pleasant to pose and the light painter could perform as well without any weather impediments.

- Our 6th attempt. More than half a year after our first attempt I decided to bring what we have learnt back to Stockholm and try a vindication from those first attempts we did in the beginning of the year. Now he had a new remote trigger to practice with and I also wanted to see what effects we could get out of incorporating sparklers to our tube. I was eager to try these two things at the same time. You can already imagine that it wasn’t such a good idea. The remote trigger was fresh out of its packaging and it took us a while to figure it out in the cold October night we had chosen to photograph on. When we finally got it working, we practiced the shapes we wanted to create, and the light faded quite quickly from the horizon so we lost the blue hour’s beautiful sky tones. By the time we felt we were ready to light the first sparkler, it was already almost pitch dark. The night was getting colder and windier, and this didn’t help when trying to fire up the sparklers. Finally one sparkler caught fire, but quickly died out before we could actually coordinate the light painting shapes and me triggering the camera with the remote. A second sparkler was hardly lit, coordination between me triggering and my boyfriend light painting was still quite poor. With every effort we felt more and more lost as though it was our first time trying this technique. By our third sparkler we felt like we’re finally entering into the right zone and we gave it a last forth shot. Feeling quite insecure about the results we left the place, half disappointed and not so sure about what happened. And what happened was that we were too impatient to try new things, thinking that we’ve got everything figured out and we practically forgot we were still just learning.
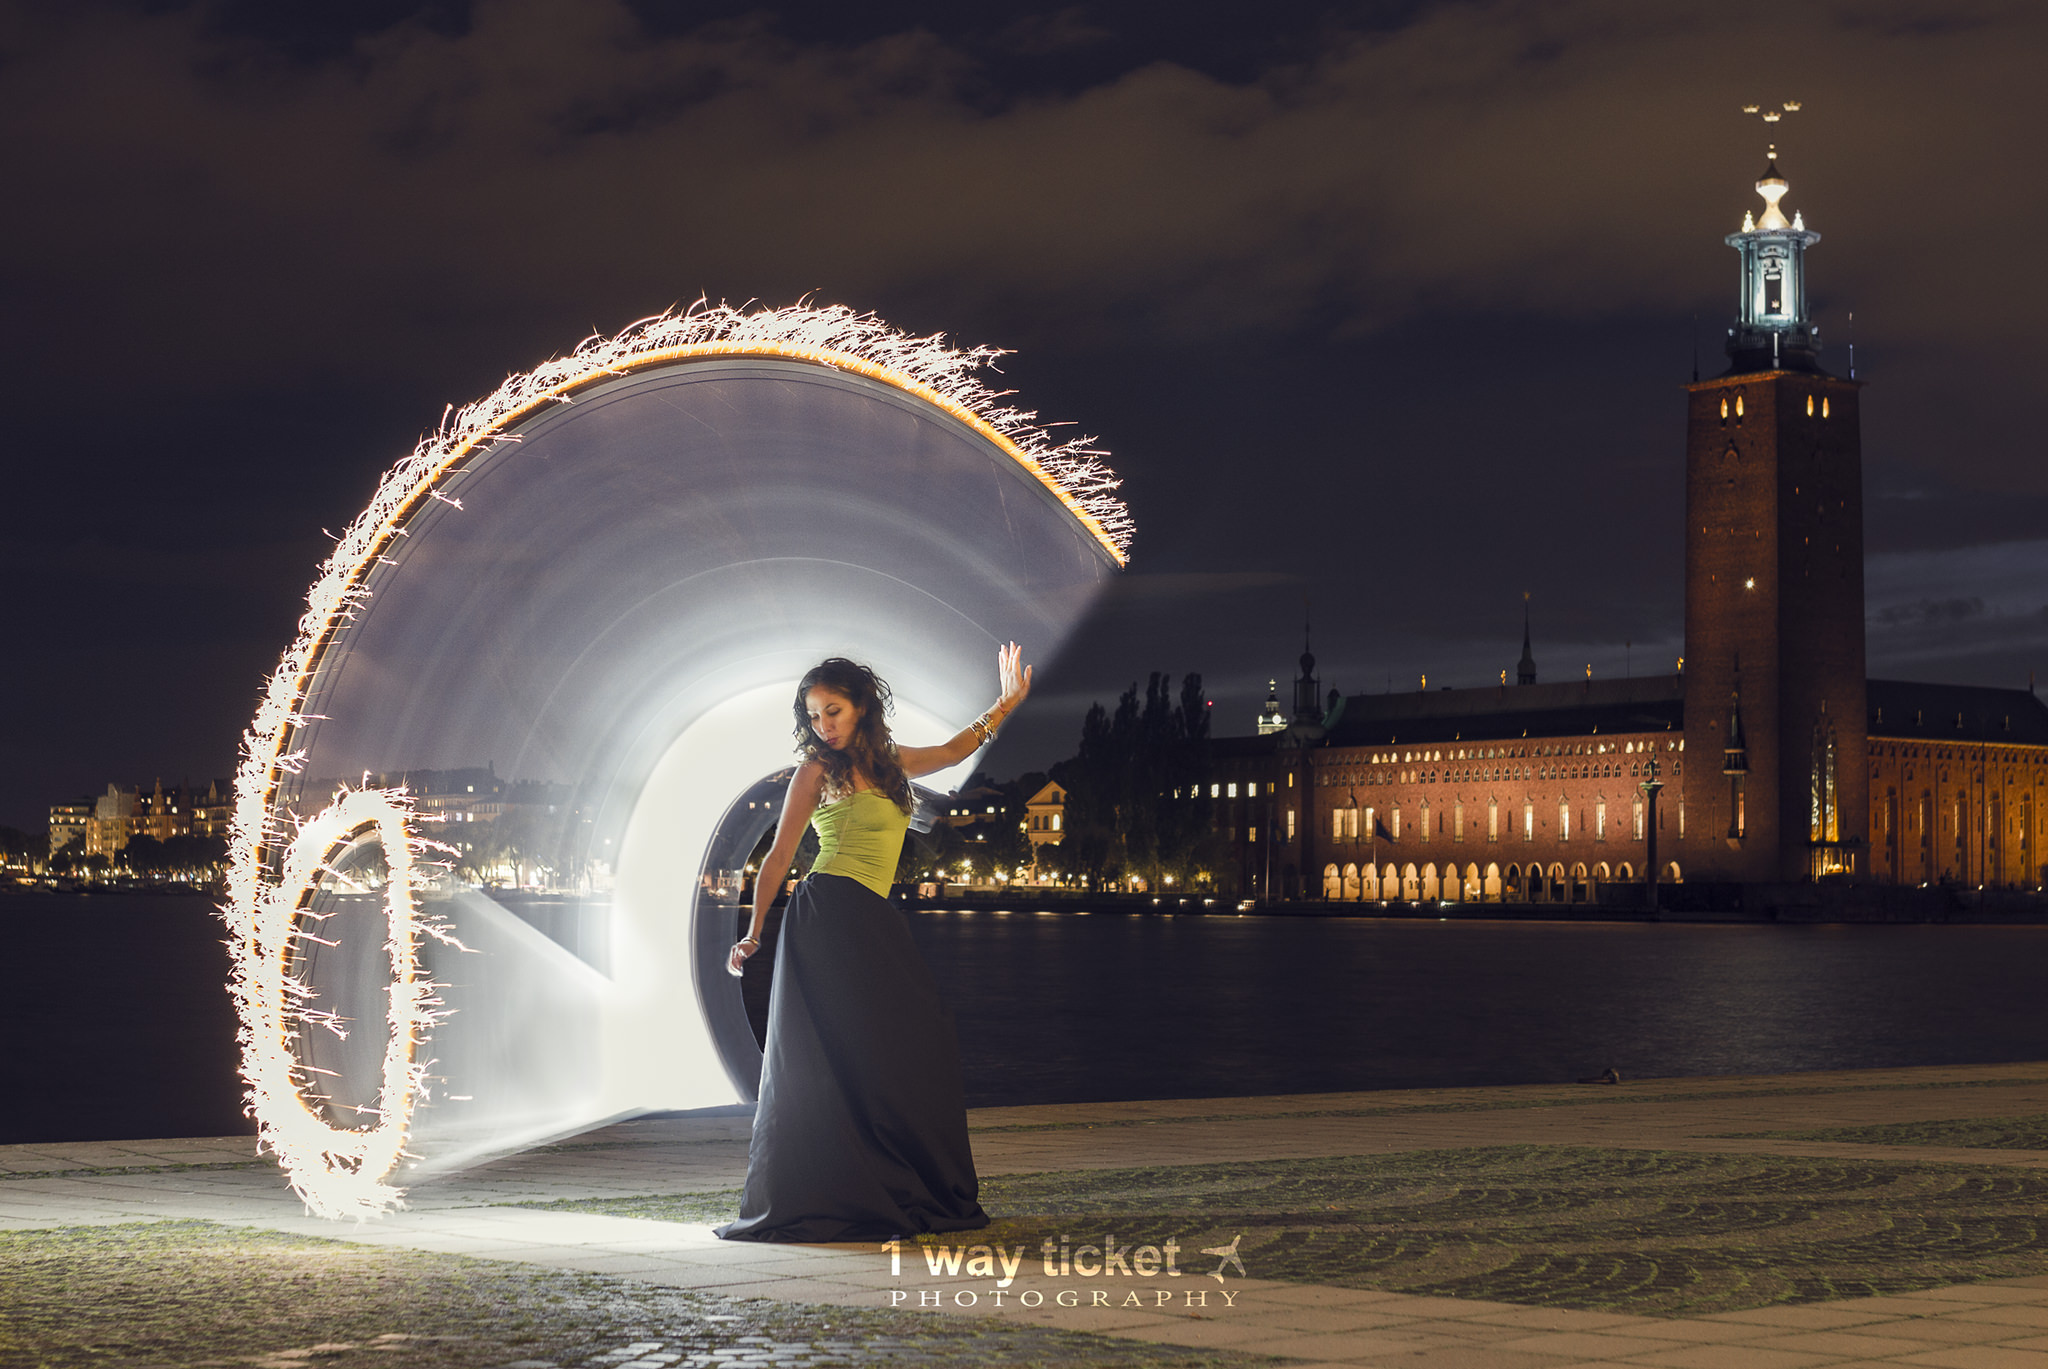
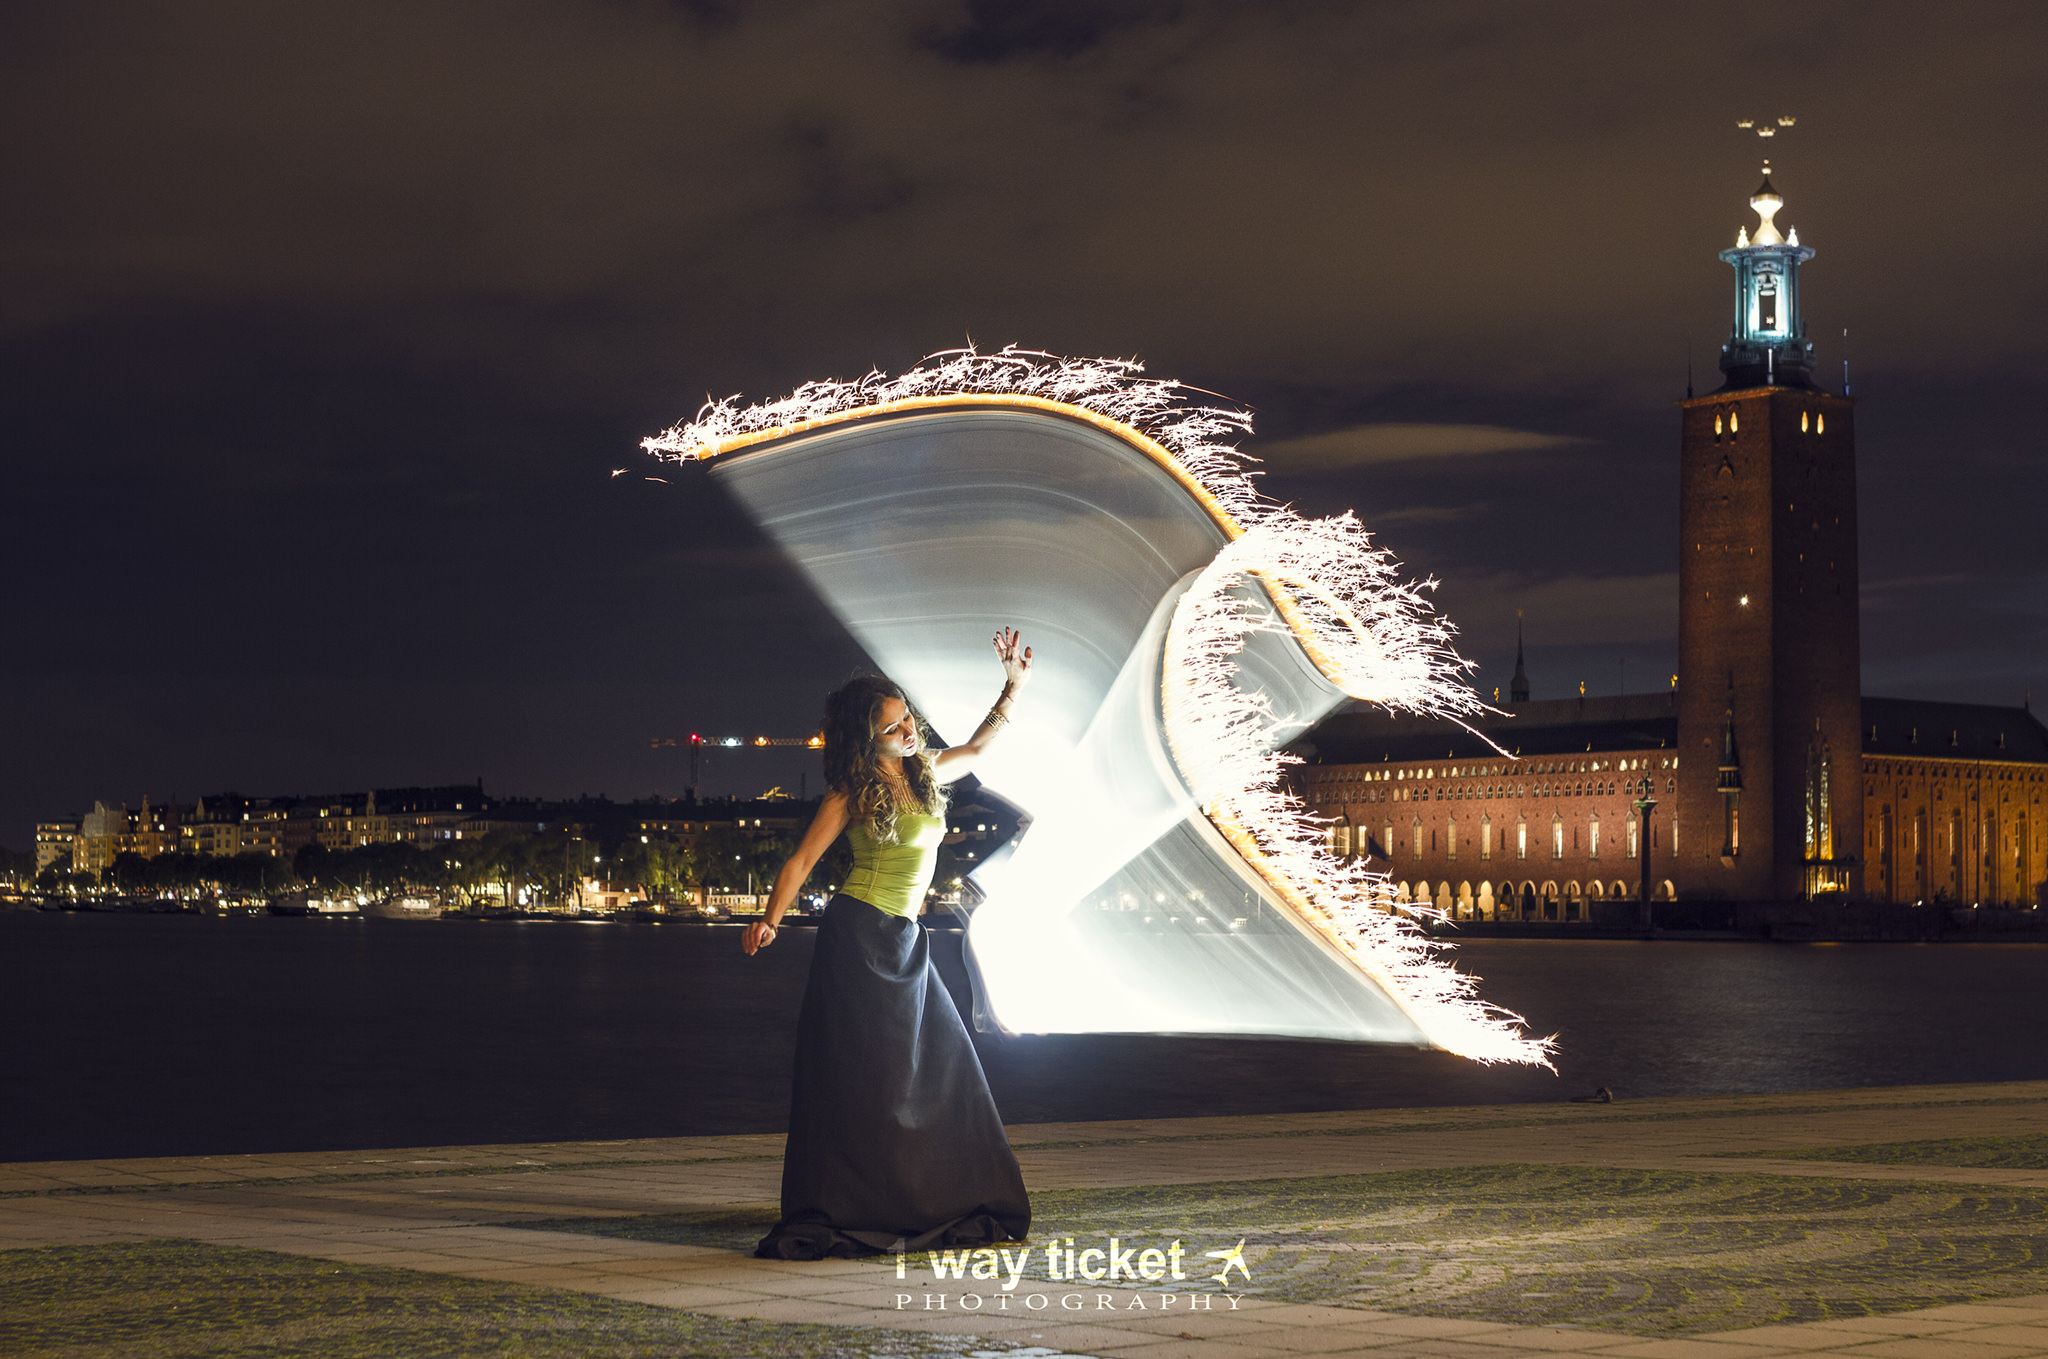
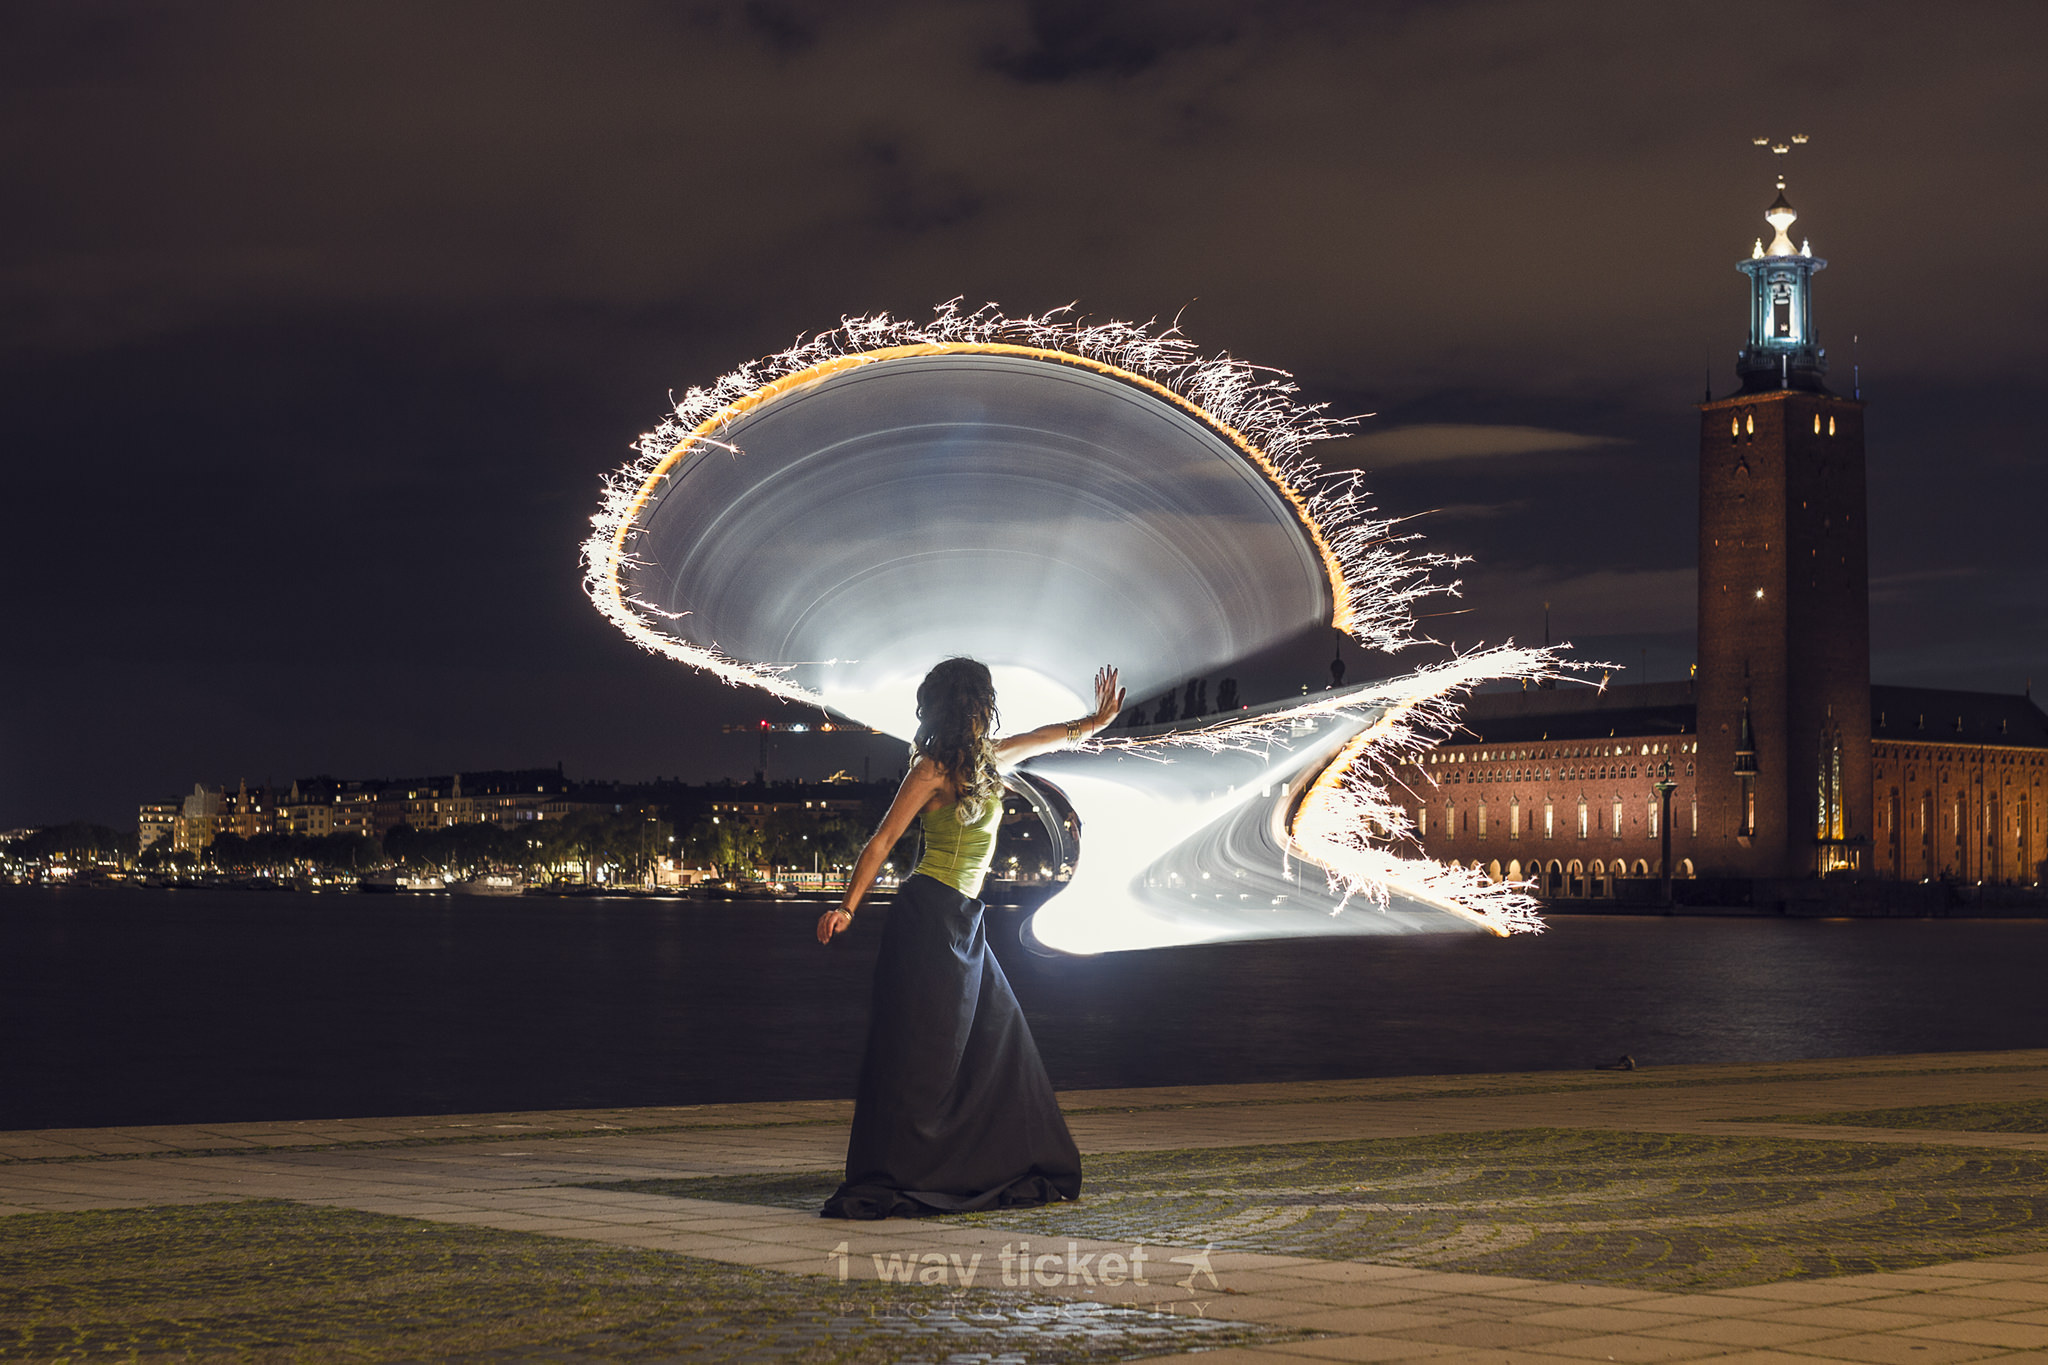
Despite only achieving a handful of good shots that evening, they were alright enough to feel redeemed and look back at the road we’ve come along with the help of a photographer who didn’t keep his magic to himself and with the help of other photographers, who have just like us shared their rights and wrongs in a learning group. Which goes to show that sharing, just like they say, is caring – and helping others is better than competing with each other.
If you have some questions or want to learn more about light painting or anything else. I’ll be happy to answer all your questions!
Website: www.1-way-ticket.com
Facebook: 1 way ticket video & photo
Instagram: @1_way_ticket_photo_video
Check more of Eirc Parè’s photography here: https://ericpare.com and follow him on Instagram: https://www.instagram.com/ericparephoto
